WordPress Accessibility
Creating Accessible Headings in WordPress
Note: the layout and tool options available in your toolbar will depend on your WordPress Theme and on your plugins.
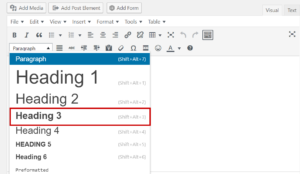
- Select the text you want to make a heading.
- On the toolbar, select Paragraph to open up the heading options. In this case, we will select Heading 3 (Shift + Alt + 3).
Adding Alt Text to Images in WordPress
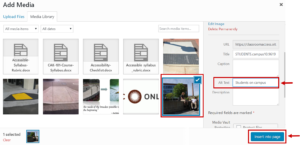
- You can add Alt Text to an image at the same time you upload to or select it from your media library.
Creating Accessible Lists in WordPress
Numbered Lists
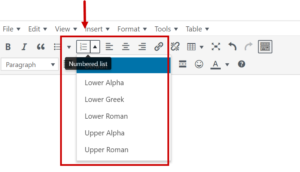
- Position the cursor anywhere in your page.
- Select the Numbered List button and choose the style you need.
Bulleted Lists
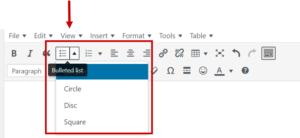
- Position the cursor anywhere in your page.
- Select the Bulleted List button and choose the style you need.
Creating Accessible Tables in WordPress
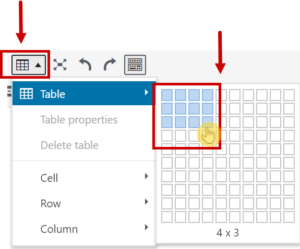
- Select the Table button.
- Then, hover the mouse over the grid on the right to select the number of rows and columns you need.
- Once you’ve made your selection, click in the corner of the rows and columns you selected to create the table.
- For example, let’s create a table with three rows and four columns.
Now select the header row and/or header column. For this example, we’ll create a header row.
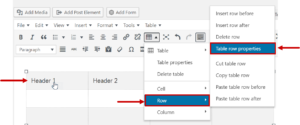
- Click on the first row.
- Click on the Table icon, then select Row > Table row properties.
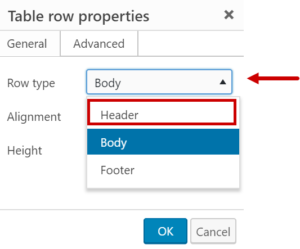
- By default, table rows are Body type. Change it to Header and click OK.
Run the WordPress Accessibility Helper
Check your pages with the WordPress Accessibility Helper. The WordPress Accessibility Helper is a tool that provides accessibility feedback using the aXe accessibility Engine. It is free plugin you can add to your WordPress environment.

